
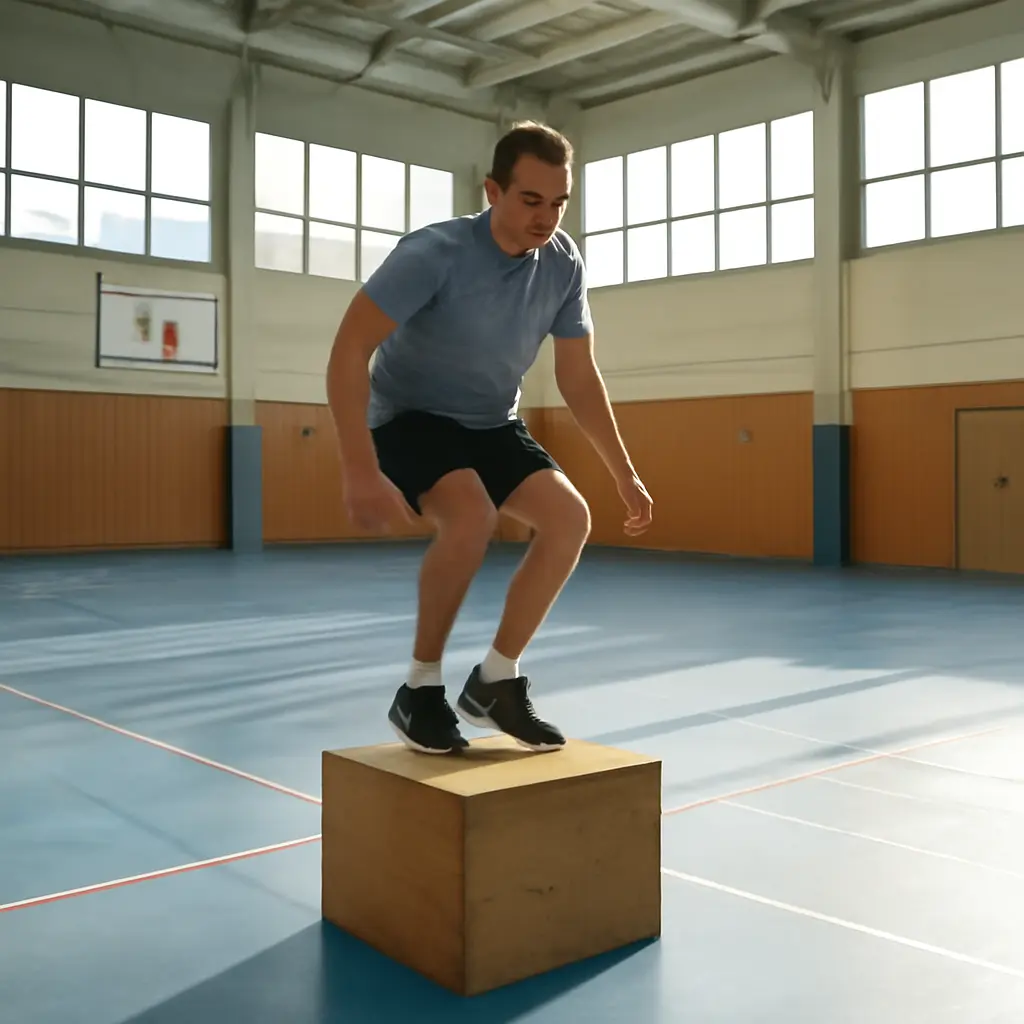
A safe landing is not simply a soft landing: it is a coordinated way to absorb force through the feet, ankles, knees, and hips while keeping the body balanced. To “chain” the feet, ankles, and hips means to let these joints work in sequence rather than asking one area to take the impact alone. Sports-medicine guidance and landing research support practicing controlled, two-legged landings with quiet contact, bent knees and hips, and knees tracking in line with the feet. This guide explains the movement chain, breaks down each joint’s role, offers drills and coaching cues, and outlines common mistakes and safety considerations.
Landing mechanics link the feet, ankles, and hips
Landing mechanics describe how the body controls its position and absorbs force when returning to the ground after a jump, hop, or drop. The National Athletic Trainers’ Association’s position statement on preventing anterior cruciate ligament (ACL) injuries in athletes recommends neuromuscular training that includes strength, balance, agility, and landing technique. In practical terms, a well-coordinated landing uses the lower limbs together: the foot establishes contact, the ankle yields and helps manage motion, and the hips and knees flex to lower the body’s center of mass.
This sequence is not a rigid, isolated “foot first, hip last” formula. Joint motions overlap, and the appropriate pattern depends on the task, speed, surface, and the person’s strength and mobility. The goal is controlled force absorption, not forcing a particular foot strike or making every landing look identical. A 2020 systematic review in the British Journal of Sports Medicine found that exercise-based programs can reduce ACL injuries in adolescent athletes; the authors reported an overall injury-rate reduction of approximately 50% in the included studies. That finding supports well-designed training, but it does not mean one landing cue can prevent every injury.
The kinetic chain: a connected system
A kinetic chain is a set of body segments and joints whose movements influence one another. When the foot contacts the floor, forces travel through the ankle, knee, hip, and trunk. The American Academy of Orthopaedic Surgeons describes the ACL as a ligament that helps stabilize the knee; landing alignment and control therefore matter, but knee loading cannot be understood separately from the rest of the body. Good technique distributes the work across several joints instead of relying on a stiff ankle, a collapsing knee, or an uncontrolled trunk.
Why landing quality matters
A landing is a rapid transition from downward motion to balance or the next movement. If the body is poorly prepared, the athlete may lose balance or expose a joint to more force than it can comfortably manage. The Centers for Disease Control and Prevention’s HEADS UP materials emphasize that sports safety also depends on factors beyond technique, including appropriate equipment, rules, conditioning, and responding promptly to possible injury. Landing practice is one useful part of a broader safety plan—not a guarantee against injury.
The foot and ankle organize initial contact
The foot-and-ankle part of the landing chain is the body’s first contact with the ground. It provides a base of support and allows the lower leg to move over the foot as the body decelerates. The American Orthopaedic Foot & Ankle Society’s patient guidance describes the ankle as a complex joint that supports body weight and enables movement in multiple directions. For landing practice, the useful principle is to make contact under control and allow a comfortable amount of ankle motion, rather than striking rigidly or collapsing unpredictably.
Foot contact and a stable base
A stable base means the foot makes controlled contact without rolling abruptly to its outer or inner edge. In a basic two-foot jump landing, aim for the feet to land about hip-width apart, with toes and knees pointing generally in the same direction. The exact stance varies with the activity and the individual. “Land on the balls of your feet” is not a universal rule: some tasks call for a forefoot-first contact, while others naturally involve the whole foot settling quickly. Avoid deliberately staying up on the toes if it prevents the heel from lowering comfortably.
Ankle mobility and force absorption
Ankle dorsiflexion is the movement that brings the top of the foot closer to the shin. During many landings, allowing the shin to travel forward over the foot—within a comfortable range—helps the ankle contribute to deceleration. Limited mobility, pain, or a history of injury may change the person’s movement strategy. A controlled calf-raise and ankle-mobility routine can support general capacity, but painful or restricted motion should not be forced; a qualified clinician can assess persistent symptoms.
Foot alignment and knee tracking
Knee tracking means the knee moves in a direction broadly consistent with the toes rather than suddenly drifting inward or outward. This is a coaching observation, not a diagnostic test, and natural anatomy varies. During a squat or landing, watch whether the whole foot stays grounded and the knee remains controlled over the foot. If the arch collapses markedly, the foot rolls, or the knee repeatedly caves inward, reduce the drill’s height or speed and build control before progressing.
The hips and knees control descent and alignment
The hips and knees help lower the body and manage the landing after contact. Hip flexion moves the thighs toward the torso; knee flexion bends the knees. Together, these motions let the body’s center of mass descend while the leg muscles help control speed. The National Strength and Conditioning Association’s coaching resources commonly emphasize sound movement patterns and progressive training. In practice, that means learning a comfortable squat and hinge before adding higher jumps, fatigue, or rapid changes of direction.
Hip flexion and glute control
Hip flexion allows the pelvis and torso to lower between the legs; the hip muscles then help control that motion and stabilize the thigh. A useful cue is “sit the hips back slightly” while keeping the chest naturally inclined, rather than staying upright and stiff. This is not a demand for an exaggerated deep squat. The appropriate depth depends on the task, available mobility, and training level.
Knee flexion without inward collapse
Bending the knees helps create a softer, more controlled landing than locking them straight. At the same time, the knees should remain actively controlled rather than dropping inward. The NATA ACL-prevention position statement supports neuromuscular training that teaches athletes to control lower-limb alignment during jumping and landing. Coaches can use a front-view check: the knees should move in line with the feet as the athlete lands and settles.
Trunk position and balance
The trunk affects where the body’s weight sits over the feet. An uncontrolled lean or twist can make it harder to balance and can alter demands on the legs. Keep the torso steady enough to remain balanced, allowing a natural forward lean when the hips and knees bend. In single-leg or sport-specific tasks, trunk control becomes especially important because the support base is smaller and the body may be rotating or changing direction.
Progress landing drills from simple to sport-specific
Landing drills teach coordination when they progress from low-force practice to more demanding movements. The American Academy of Pediatrics’ sports-conditioning guidance recommends age-appropriate, well-supervised training and gradual progression. Begin with a movement the athlete can perform quietly and in balance; increase height, speed, repetition, or complexity one factor at a time. Stop or regress if technique deteriorates or pain appears.
Step-and-stick landing
A step-and-stick is a low-intensity drill in which the athlete steps off a low platform or takes a small hop, lands on two feet, and holds the position for two to three seconds. It teaches quiet contact, balanced foot placement, knee tracking, and controlled hip-and-knee bending. Start from a low height and focus on a stable finish rather than jumping for distance.
Squat-to-jump landing
A squat-to-jump landing adds a small vertical jump to a familiar squat pattern. Jump only as high as needed to practice a clean landing, then reset between repetitions. A coach can observe from the front and side to check whether the feet remain balanced, the knees stay controlled, and the hips and knees bend together. This is a technique drill, not a test of maximum jumping ability.
Single-leg and change-of-direction progressions
Single-leg hops, lateral bounds, and cutting drills add greater balance and coordination demands. They should come after the athlete demonstrates control in simpler two-leg drills. Begin with small distances and deliberate holds before adding speed or reacting to an external cue. A real-world example is a basketball player practicing a low lateral bound and stable hold before progressing to a faster defensive shuffle; the drill rehearses a sport-relevant position without immediately introducing full-speed play.
A simple coaching checklist
- Land with the feet in a comfortable, balanced stance.
- Let the ankles, knees, and hips bend naturally to control the descent.
- Keep the knees moving generally in line with the toes.
- Maintain a steady trunk and finish balanced.
- Progress only when the current drill is repeatable and pain-free.
Common landing errors and safer adjustments
Landing errors are movement patterns that reduce control or create discomfort; they are not, by themselves, proof that an injury will occur. Technique should be judged in context, including the athlete’s experience, fatigue, footwear, surface, and task. A useful coaching response is to simplify the movement, give one clear cue, and check whether control improves.
Stiff or noisy contact
A rigid landing often sounds louder and leaves little visible bending at the ankle, knee, or hip. Try lowering the jump height and cueing a quiet, balanced landing with comfortable joint flexion. Quietness is a simple feedback tool, not a measurement of impact force or a guarantee of safety.
Knees drifting inward
Repeated inward knee movement can indicate that the athlete is struggling to control the task, especially when it occurs with loss of balance or foot collapse. Reduce the speed or range, practice squats and step-and-stick landings, and use a mirror or coach’s front-view observation. Do not force the knees excessively outward; aim for controlled alignment that suits the person’s natural stance.
Too much height, fatigue, or volume
When a drill becomes too demanding, coordination can deteriorate. Keep early practice brief, allow recovery between sets, and stop when the athlete can no longer maintain the intended pattern. There is no single jump count appropriate for everyone. Training volume should reflect age, sport, conditioning, previous injuries, and the rest of the practice schedule.
Pain, injury, and when to seek help
Sharp pain, swelling, a feeling that the joint gives way, or difficulty bearing weight warrants stopping the drill and seeking appropriate medical advice. The American Academy of Orthopaedic Surgeons advises assessment for significant knee symptoms such as severe pain, marked swelling, or inability to move or bear weight normally. Anyone returning after an injury should follow guidance from a healthcare professional rather than using general drills as a substitute for rehabilitation.
Conclusion: coordinate the chain, then build intensity
Landing like a pro means coordinating the foot’s stable contact, the ankle’s controlled motion, and the hips and knees’ contribution to lowering the body. A balanced trunk and knees that track generally with the feet help complete the pattern. Start with simple, low-impact drills, use quiet contact and controlled alignment as feedback, and progress toward single-leg or sport-specific tasks only when the basics remain consistent. Because technique is just one part of injury prevention, combine it with appropriate conditioning, supervision, recovery, and prompt attention to pain. Ask a qualified coach or healthcare professional to help tailor the drills to your sport, experience, and needs.
Sources: National Athletic Trainers’ Association, “Prevention of Anterior Cruciate Ligament Injury: A Systematic Review and Meta-analysis,” Journal of Athletic Training, 2018, https://pmc.ncbi.nlm.nih.gov/articles/PMC6058426/; Webster, K. E. and Hewett, T. E., “Meta-analysis of meta-analyses of anterior cruciate ligament injury reduction training programs,” British Journal of Sports Medicine, 2020, https://bjsm.bmj.com/content/54/15/879; American Academy of Orthopaedic Surgeons, “Anterior Cruciate Ligament (ACL) Injuries,” https://orthoinfo.aaos.org/en/diseases–conditions/anterior-cruciate-ligament-acl-injuries/; American Orthopaedic Foot & Ankle Society, “Anatomy of the Foot and Ankle,” https://www.footcaremd.org/resources/how-to-help/the-anatomy-of-the-foot-and-ankle; Centers for Disease Control and Prevention, “HEADS UP to Youth Sports,” https://www.cdc.gov/heads-up/; American Academy of Pediatrics, “Strength Training by Children and Adolescents,” Pediatrics, 2020, https://publications.aap.org/pediatrics/article/145/6/e20201011/76959/Strength-Training-by-Children-and-Adolescents; American Academy of Orthopaedic Surgeons, “Knee Pain and Problems,” https://orthoinfo.aaos.org/en/diseases–conditions/knee-pain-and-problems/.